
Putting together a trampoline might seem like a big job, especially if it's your first time. You might look at all the parts and wonder where to even begin. But honestly, it's not as complicated as it looks. With a little patience and by following these simple steps, you'll have your trampoline ready for bouncing in no time. This guide breaks down the process, making sure you get it right the first time.
Key Takeaways
- Always read the trampoline instructions carefully before you start. It's the best way to make sure everything goes together correctly and safely.
- Take your time setting up. Rushing can lead to mistakes, like not tightening bolts properly or missing a step, which can make the trampoline unsafe.
- Pick a good spot for your trampoline. It needs to be flat, clear of anything overhead, and have plenty of space around it.
- When you're done assembling, do a final check. Make sure all the parts are tight and the safety net is secure before anyone jumps on it.
- After it's set up, keep an eye on your trampoline. Check it regularly for any loose parts or damage, and always stick to the weight limits.
Understanding Your Trampoline Components
Alright, before we get to the fun part of actually putting this thing together, let's take a minute to get familiar with all the bits and pieces. It might seem like a lot, but knowing what each part does is super important for a safe and sturdy setup. Think of it like knowing your tools before you start building a birdhouse – you wouldn't want to grab a hammer when you need a screwdriver, right?
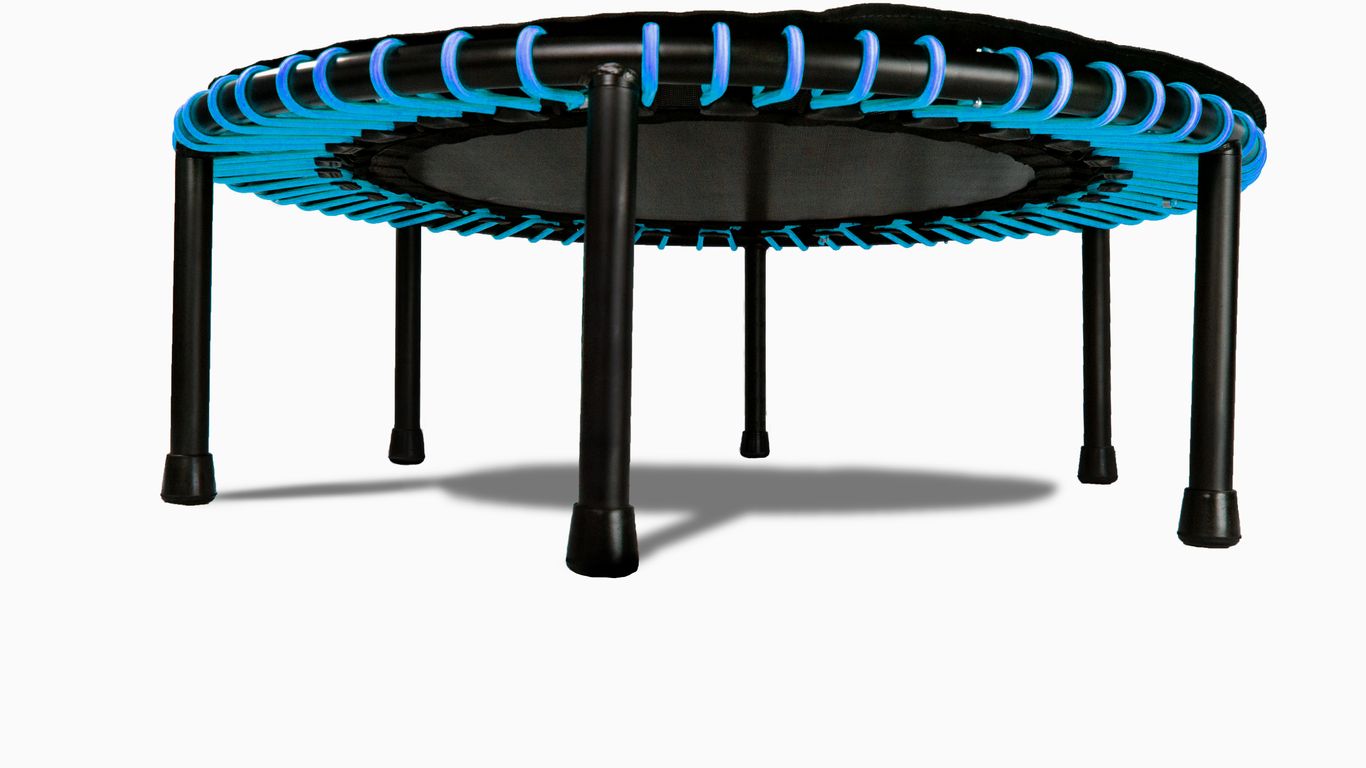
Frame Components for Stability
This is the backbone of your trampoline. The frame is usually made of strong metal, like steel, and it's what everything else attaches to. It needs to be solid and well-connected to keep the whole structure from wobbling around. The legs are part of this too; they're what hold the frame up off the ground. A strong frame means a stable trampoline, and a stable trampoline is a safe trampoline. You'll want to check that all the frame pieces fit together snugly and that the legs are firmly attached.
The Jumping Mat's Role
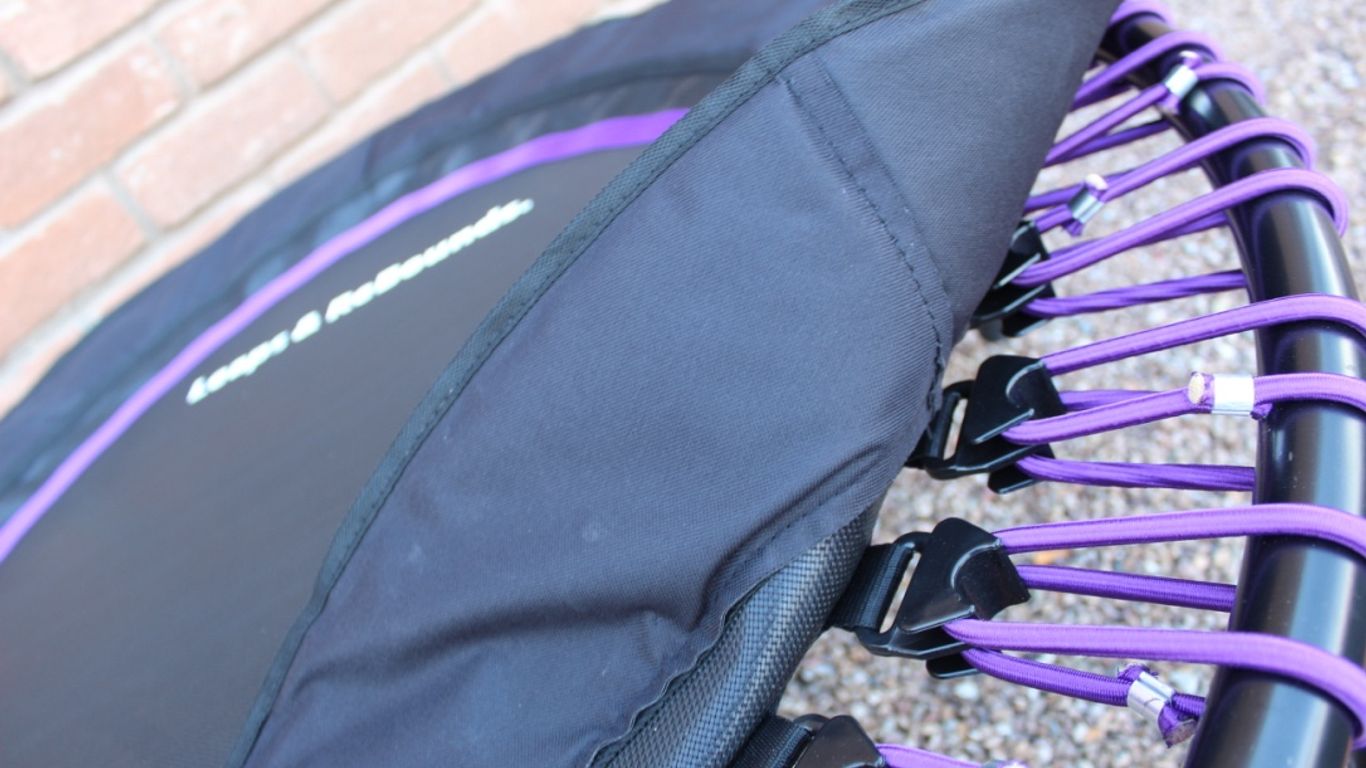
This is the part you actually bounce on! The jumping mat is made of a tough, woven material that can handle a lot of stress. It's designed to give you that springy feeling when you jump. It connects to the frame using springs or sometimes bungee cords. When you're looking at the mat, check for any signs of wear, like small tears or loose threads, especially around the edges where it connects. A damaged mat can be a real safety hazard.
Essential Safety Net Features
This is your first line of defense against accidental tumbles off the trampoline. The safety net, often called an enclosure, surrounds the jumping area. It's usually made of a strong mesh material that's also weather-resistant. The poles that hold the net up are also key components. Make sure the net is attached securely all the way around and that there are no holes or tears. It's there to keep everyone safely inside the bouncing zone.
Purpose of the Trampoline Ladder and Anchor Kit
Let's talk about getting on and off safely. The ladder is pretty straightforward – it just helps you climb up onto the trampoline without a big leap. It's especially helpful for younger kids. Then there's the anchor kit. This is super important, especially if you live in an area with windy weather. The anchors dig into the ground and keep the trampoline from moving or tipping over. It's like giving your trampoline some extra roots.
Understanding each component helps you appreciate why the assembly steps are so specific. It's not just about making it look right; it's about making it work safely.
Here's a quick rundown of what you'll typically find:
- Frame: The main structure, usually metal, providing support.
- Legs: Hold the frame off the ground.
- Jumping Mat: The surface you bounce on.
- Springs/Bungees: Connect the mat to the frame, providing the bounce.
- Safety Pad: Covers the springs and frame edges.
- Safety Net (Enclosure): Surrounds the jumping area to prevent falls.
- Net Poles: Support the safety net.
- Ladder: For easy access.
- Anchor Kit: Secures the trampoline to the ground.
Knowing these parts will make following the assembly instructions much easier. If you ever need to replace a part, knowing its name will help you find the right replacement parts for your specific model.
Preparing for Trampoline Assembly
Alright, so you've got your new trampoline, and you're itching to get it set up. Before you even think about unboxing, let's talk about getting ready. This part is super important, and honestly, it makes the actual assembly go way smoother. Skipping these prep steps is a fast track to frustration and potential safety issues down the line.
First things first, let's tackle that box. You'll want to open it up carefully and check everything against the parts list in your manual. Seriously, don't just glance at it. Make sure every single bolt, spring, and frame piece is accounted for. If something's missing, now's the time to call the manufacturer, not when you're halfway through and stuck. It's a good idea to get your backyard ready for spring with this checklist, which includes trampoline setup.
Once you know you have all the bits, it's time to get organized. Lay everything out, maybe group similar items together. Think of it like sorting your LEGOs before you build something epic. This saves so much time and confusion later. You'll need a few tools too, so gather those up. Usually, it's pretty basic stuff like a screwdriver, maybe a rubber mallet, and definitely some gloves to protect your hands. Don't forget safety goggles!
Here’s a quick rundown of what you might need:
- Safety Gear: Gloves, safety goggles.
- Tools: Screwdriver set, rubber mallet, spring puller tool (often included).
- Accessories: Measuring tape (to check location space).
Now, about the location. This is a big one. You need a spot that's flat, level, and has plenty of space all around it. No lopsided trampolines, please! Make sure there are no trees, fences, or other hazards nearby. Think about where the sun hits too, you don't want to be jumping in direct glare all afternoon. Choosing the right spot is key for safe use.
You might be tempted to just start bolting things together, but taking a little extra time to prepare can prevent a lot of headaches. It’s about setting yourself up for success, making the process less of a chore and more of a fun family activity (or at least, a less stressful solo mission).
So, before you dive into the actual building, give yourself a good hour or so for this preparation phase. It’s a small investment that pays off big time.
Step-by-Step Trampoline Installation Guide
Alright, let's get this trampoline put together! It might seem like a lot of pieces at first, but if you take it one step at a time, you'll have it ready for bouncing in no time. Remember, patience is key here.
Assembling the Frame and Legs
First things first, you need to build the main structure. Most trampolines start with assembling the frame pieces. You'll usually connect several curved or straight metal sections together. Make sure each connection is snug and secure before moving on. Then, attach the legs. These can be U-shaped or straight, and they need to be firmly connected to the frame. It's really important that the frame sits level on the ground. If it's wobbly, the whole trampoline won't be safe. You might need to dig out a little soil or add some flat stones under the legs to get it just right. This is the foundation for everything else, so don't rush it.
Attaching the Jumping Mat and Springs
Now for the fun part – the mat! Lay the jumping mat out flat. You'll see loops or grommets all around its edge. These are where the springs attach. You'll also see holes or hooks on the trampoline frame. You'll need to attach the springs one by one, connecting a loop on the mat to a hook on the frame. It's best to do this in a star pattern, attaching a spring, then moving across the trampoline to attach the opposite one. This helps distribute the tension evenly. You might need a spring-pulling tool, which often comes with the trampoline, to get the last few springs on. It can be tough work, so take breaks if you need them.
Securing the Protective Pad
Before you even think about jumping, you need to cover up those springs. The protective pad, often called a safety pad, goes right over the springs and the edge of the frame. It usually has ties or Velcro straps to keep it in place. Make sure it's pulled taut and covers all the metal parts completely. You don't want anyone's foot or hand getting caught in the springs. Double-check that it's secure all the way around.
Installing the Safety Net and Poles
This is a big safety feature, so pay attention. The safety net usually attaches to poles that stand around the outside of the trampoline. First, you'll likely assemble the poles, which might involve connecting lower and upper sections. These poles then attach to the trampoline frame or legs. Once the poles are up, you'll attach the net itself. It needs to be pulled tight and secured to the top of the poles and often to the frame at the bottom. Make sure there are no gaps where someone could fall out. This net is your last line of defense against accidental tumbles off the trampoline.
Getting the trampoline set up correctly is more than just following steps; it's about building a safe play space. Take your time, read the specific instructions that came with your model, and if something doesn't feel right, stop and re-check. It's better to spend an extra hour making sure it's solid than to deal with a problem later.
After the net is up, give the whole thing a good once-over. Check that all the springs are in place, the pad is secure, and the net is taut. A quick shake of the frame can tell you if it feels sturdy. If you have a ladder, attach it now, making sure it's stable. You're almost there!
Finalizing Trampoline Setup
Alright, you’ve got the main parts of your trampoline together, but finishing up is just as important. This is where you double-check everything, add the final touches, and make sure it’s safe before anyone starts bouncing.
Fixing the Ladder and Accessories
Securing the ladder is usually the last step. Attach it tightly using the hooks or straps that came in your kit. Make sure it’s sturdy and that there’s no wobbly movement when you put pressure on it. Extra accessories, like a basketball hoop or storage bag, should be installed only after the main structure is done and stable.
- Attach the ladder so it touches the ground securely
- Double check any accessory add-ons for tightness
- Only use manufacturer-provided parts and instructions for each item
Adding these bits might seem easy, but if you rush or lose focus, things can shake loose when you least expect it.
Ensuring All Components Are Secure
This part’s all about double-checking yourself. Go around the trampoline and inspect each part:
- Test all bolts, nuts, and screws for tightness
- Gently press down on the mat to feel for even give and strong support
- Tug the safety net and braces to be sure they don’t shift when pulled
| Component | What to Check | What to Do If Loose |
|---|---|---|
| Ladder | Shakes or tilts | Retighten hooks/straps |
| Frame | Loose bolts or wiggle | Tighten bolts |
| Springs | Uneven stretch or missing | Replace or adjust |
| Net | Gaps or weak attachment | Reclip and retighten |
Even small issues are better caught now than after someone gets hurt.
Conducting a Thorough Safety Check
Before you let any kids or adults hop on, give the entire set-up a thorough once-over. Safety checks can prevent small problems from turning into big accidents.
- Walk a circle around the trampoline and look for gaps, tears, or sharp edges
- Check that the jumping mat, net, and pads are undamaged, tight, and lying flat
- Try giving the frame and enclosure a gentle shake – it should not move
Take your time with the safety check. It's easy to skip over, but worth every minute if it keeps someone from getting hurt.
If you want more details about how to safely set up features like the safety net, instructions provided within the Bounce Pro 14 Trampoline setup outline a solid approach that works for most modern trampoline models.
By the end of this section, your trampoline should be safe, sturdy, and totally ready for action. Grab a water bottle, stretch out, and watch the smiles start. Just remember, a proper finish is sometimes the most important step of the entire build.
Avoiding Common Trampoline Installation Pitfalls
Putting together a trampoline might seem straightforward, but a few common slip-ups can turn a fun project into a safety hazard. It's easy to get excited and want to start bouncing right away, but taking shortcuts can lead to big problems down the road. Paying close attention to the details during assembly is key to a safe and enjoyable trampoline experience.
The Importance of Following Trampoline Instructions
Seriously, don't toss that manual aside! It’s not just a suggestion; it’s your roadmap. Manufacturers put those instructions together for a reason, usually after a lot of testing. Skipping steps or guessing how things fit can lead to a wobbly frame or parts that aren't quite secure. This can compromise the whole structure, making it unstable. A poorly assembled trampoline isn't just less fun; it's downright dangerous. Always follow the manufacturer's guide to the letter; it's the best way to ensure proper trampoline assembly.
Consequences of Choosing a Poor Location
Where you put your trampoline matters more than you might think. Picking a spot that's not level or has overhead hazards like tree branches or power lines is a recipe for disaster. Uneven ground can make the trampoline unstable, and falling objects can cause serious injury. You need a clear, flat space with plenty of room all around. Think about accessibility too – you don't want it crammed against a fence or a wall. A good location means fewer worries and more safe bouncing.
The Dangers of Rushing the Assembly Process
We've all been there, wanting to finish a task quickly. But with trampolines, rushing is a major pitfall. It’s easy to miss tightening a bolt, misalign a frame piece, or forget to secure the safety net properly when you’re in a hurry. These small oversights can lead to bigger issues, like a frame that bends or parts that come loose during use. A wobbly frame is a big red flag, indicating that the structural integrity might be compromised. Take your time, work methodically, and double-check each step. It’s better to spend an extra hour now than deal with an accident later. Here are some common mistakes to watch out for:
- Not checking that all bolts and screws are fully tightened.
- Attaching the mat or springs unevenly, creating tension problems.
- Failing to properly secure the safety net poles or the net itself.
- Not placing the protective padding correctly over the springs and frame.
When assembling, imagine you're building something that needs to withstand a lot of movement and force. Every connection, every spring, and every pole plays a part in the overall safety. Don't assume something is secure; check it. A little extra effort during setup pays off big time in preventing injuries.
Ongoing Safety and Maintenance
Regular Trampoline Inspections
So, you've got your trampoline all set up and ready for bouncing. That's awesome! But the job isn't quite done yet. To keep things safe and fun, you've got to keep an eye on it. Think of it like checking your car's oil – a little attention now can save you a lot of headaches later. A quick once-over before each jumping session is a good habit to get into. Look for anything that seems out of place. Are all the springs still hooked on tight? Any rips or tears in the mat that weren't there yesterday? How about the safety net – is it looking a bit saggy or are there any holes? Even a small snag can become a bigger issue if left unchecked.
It's also a good idea to do a more thorough check at least once a season. This means really getting in there and looking at the frame for any rust or bends, especially where the legs connect. Check the padding around the edges too; sometimes the fasteners can wear out. If you spot any minor damage, like a small hole in the mat or a loose spring, it's usually something you can fix yourself with a repair kit or by tightening a bolt. Don't wait for these little things to turn into big problems. For more detailed guidance on what to look for, you can check out regular trampoline maintenance.
Adhering to Weight Limits
This one's pretty straightforward, but super important. Every trampoline has a weight limit, and it's there for a reason. It's not just about keeping the trampoline from breaking; it's about safety. When too much weight is on the mat, it can affect the bounce in unpredictable ways, making it harder to control and increasing the risk of accidents. Plus, exceeding the limit puts a lot of extra stress on the springs and the frame, which can lead to premature wear and tear.
Here’s a quick look at what to keep in mind:
- Know Your Limit: Always check the manufacturer's specifications for your specific trampoline model. This information is usually in the manual you got when you bought it.
- One at a Time: For most trampolines, especially for younger kids, it's best to have only one person jumping at a time. This avoids collisions and makes it easier to manage the bounce.
- Supervise Closely: If multiple people are allowed to jump (and the weight limit permits), make sure an adult is supervising to ensure everyone is jumping safely and not pushing the limits.
Exceeding the weight limit can lead to serious damage and injuries. It's just not worth the risk.
Ensuring the Safety Net is Always Used
The safety net, or enclosure, is probably one of the most critical safety features on your trampoline. Its whole purpose is to keep jumpers from accidentally bouncing off the mat and onto the ground. It's like a big, soft wall that catches you if you get a little too wild with your jumps. Never, ever take the safety net down or leave it unzipped while the trampoline is in use.
Think about it: a fall from even a few feet can cause serious injuries, especially to children. The net is designed to prevent those kinds of falls. So, make sure it's always properly attached, zipped up, and in good condition. If you notice any rips or tears in the net, or if the poles holding it up seem wobbly, you need to address that right away. A damaged net isn't much good. Keeping the net in top shape is just as important as checking the springs or the mat. It's all part of making sure everyone stays safe while having a blast.
Taking a few minutes to inspect your trampoline regularly, respecting its weight limits, and always using the safety net can prevent a lot of potential problems. It's about being proactive so that the trampoline remains a source of fun, not a source of worry.
Keeping your rebounder in top shape is simple! Regular checks ensure it's always ready for your next jump session. For detailed tips on care and upkeep, visit our website.
Ready to Jump!
So, putting together a trampoline might seem like a big job at first, but if you take your time and follow the steps, it's totally doable. Remember to always check the manual, pick a good spot, and don't rush. Once it's all set up, keep an eye on it now and then, make sure everyone follows the rules, and you'll have a safe place for tons of fun. Happy bouncing!
Frequently Asked Questions
What are the main parts of a trampoline I need to know about?
You'll usually find a sturdy frame that holds everything together, a strong jumping mat for bouncing, springs that give you that lift, a safety net to keep you from falling off, and often a ladder for easy access. Some also come with an anchor kit to keep it from moving.
What should I do before I start putting the trampoline together?
First, check the box to make sure all the pieces are there. Then, spread out all the parts and group similar ones together so you know what's what. Finally, grab any tools you might need, like gloves or a screwdriver, and pick a good spot for the trampoline.
Where is the best place to set up my trampoline?
Find a spot in your yard that's nice and flat, with plenty of space all around. Make sure there are no trees, fences, or power lines nearby that could get in the way or be dangerous. A level surface is super important for stability.
How do I make sure the trampoline is safe after I assemble it?
After you think you're done, go back and check everything! Make sure all the bolts are tight, the springs are hooked on right, and the safety net is pulled taut. Give the mat a gentle push to see if the whole thing feels steady. It's better to be extra careful!
What are common mistakes people make when building a trampoline?
A big one is not reading the instructions carefully! Also, rushing through the steps can cause you to miss important details. Choosing a bad spot, like on a slope or too close to something, is another common and dangerous mistake.
How often should I check my trampoline after it's set up?
You should look it over regularly. Check for any loose parts, tears in the mat or net, or anything that looks worn out. Always make sure no one is jumping on it if it's damaged, and be sure to stick to the weight limits so it doesn't break.


0 comments