Thinking about stepping up your gym game? If you've been wondering if hitting the gym more often could be the ticket to building more muscle, you're on the right track. A structured 6 day gym workout schedule to build muscle is a really effective way to get stronger and bigger. It lets you hit your main muscle groups more often while still giving them time to recover. This isn't about just going to the gym every day; it's about training smarter and more frequently.
Key Takeaways
- A 6 day gym workout schedule to build muscle increases training frequency, hitting muscle groups multiple times weekly for better growth.
- This program combines strength days with hypertrophy days, focusing on heavy lifts first, then higher volume work.
- The split includes dedicated days for upper body, lower body, push muscles, pull muscles, and legs, plus active recovery.
- Proper nutrition, especially sufficient protein and a slight calorie surplus, is vital for muscle repair and growth.
- Consistency and progressive overload are key; gradually increase weight, reps, or sets over time to keep challenging your muscles.
Day 1: Upper Body Strength
Alright, let's kick things off with Day 1, focusing on upper body strength. This is where we hit those big pushing and pulling muscles – chest, back, shoulders, and arms. The goal here isn't just about getting a pump, though that's a nice bonus. We're aiming to lift heavy with solid form to build a strong foundation. Think of this as building the core structure of your upper body.
We'll start with compound movements, the heavy hitters that work multiple muscle groups at once. These are super efficient for building overall strength and muscle mass. Focus on controlled movements and proper technique over just lifting the most weight.
Here’s the breakdown for Day 1:
- Barbell Bench Press: 4 sets of 5-8 reps. Rest for 90-120 seconds between sets. This is your main chest builder. Make sure your shoulder blades are pulled back and down, and drive your feet into the floor for stability.
- Barbell Row: 4 sets of 5-8 reps. Rest for 90-120 seconds. This is key for building a thick back. Focus on pulling with your back muscles, not just your arms, and squeeze your shoulder blades together at the top.
- Seated Dumbbell Shoulder Press: 3 sets of 8-10 reps. Rest for 60-90 seconds. A great exercise for building shoulder strength and size.
- Lat Pulldowns: 3 sets of 8-12 reps. Rest for 60-90 seconds. If pull-ups are too tough right now, this is your go-to for back width.
- Dumbbell Skull Crushers: 3 sets of 10-12 reps. Rest for 60 seconds. Time to hit those triceps directly.
Remember, consistency is more important than intensity on any single day. Showing up and putting in the work with good form will lead to progress over time. Don't get discouraged if you can't lift as much as you'd like right away. Focus on getting stronger week by week.
Day 2: Lower Body Strength
Alright, Day 2 is all about building that solid lower body foundation. We're hitting the big lifts today, the ones that really make a difference in overall strength and how you move day-to-day. Focus on controlled movements and proper form above all else.
Here's the game plan:
- Barbell Back Squat: 4 sets of 5-8 reps. Take about 90-120 seconds rest between sets. This is your main strength builder for the legs. Really focus on pushing through your heels and keeping your chest up.
- Romanian Deadlifts (RDLs): 3 sets of 8-10 reps. Rest for 90 seconds. Remember, this is a hinge movement. Feel that stretch in your hamstrings as you push your hips back.
- Leg Press: 3 sets of 10-12 reps. Rest 60-90 seconds. A great way to add volume and hit your quads and glutes.
- Lying Leg Curls: 3 sets of 12-15 reps. Rest for 60 seconds. This targets your hamstrings directly.
- Standing Calf Raises: 4 sets of 15-20 reps. Rest 45-60 seconds. Don't skip calf work; they're important too!
When performing squats and deadlifts, think about creating tension throughout your body before you even start the movement. Brace your core like you're about to get hit, and keep your back straight. This protects you and lets you lift more weight safely.
Day 3: Push Hypertrophy
Alright, Day 3 is all about pushing movements – think chest, shoulders, and triceps. The goal here isn't just to lift heavy, but to really focus on muscle growth. We're going to crank up the reps a bit and aim for that satisfying muscle pump.
This workout is designed to maximize time under tension for your pushing muscles.
Here’s how we’ll tackle it:
- Incline Dumbbell Press: 4 sets of 8-12 reps. Take about 60-90 seconds rest between sets. Really focus on controlling the weight as you lower it.
- Seated Arnold Press: 3 sets of 10-12 reps. Rest for 60-90 seconds. This move works your shoulders nicely, so keep the movement smooth.
- Cable Crossovers: 3 sets of 12-15 reps. Rest for 60 seconds. Focus on squeezing your chest at the end of each rep.
- Dumbbell Lateral Raises: 3 sets of 15-20 reps. Rest for 45-60 seconds. We're going for that burn here to build wider shoulders.
- Rope Triceps Pushdowns: 4 sets of 12-15 reps. Rest for 60 seconds. Finish off those triceps with a good squeeze.
Remember, the key to hypertrophy is consistent tension and pushing yourself just enough to stimulate growth without compromising form. Don't be afraid to feel the burn; that's often a good sign you're working the target muscles effectively.
Day 4: Pull Hypertrophy
Alright, Day 4 is all about building that impressive back and those biceps that fill out your sleeves. We're really focusing on volume here, making sure we hit those muscles from a few different angles to get the most out of every single rep. The goal is to create a serious pump and recruit as many muscle fibers as possible.
Here's how we're going to do it:
- Weighted Pull-Ups (or Assisted/Lat Pulldowns): 4 sets of 6-10 reps. Rest 90 seconds. If you can't do unassisted pull-ups yet, that's totally fine. Use an assisted machine or go straight to lat pulldowns. The key is to focus on pulling with your back muscles, driving your elbows down and back.
- T-Bar Row: 3 sets of 8-12 reps. Rest 60-90 seconds. Really squeeze your shoulder blades together at the top of each rep. Think about pulling your chest towards the bar.
- Face Pulls: 3 sets of 15-20 reps. Rest 60 seconds. These are great for hitting the rear delts and upper back, which are often neglected. Pull the rope towards your face, aiming your hands towards your ears.
- Incline Dumbbell Curls: 3 sets of 10-12 reps. Rest 60 seconds. This stretch at the bottom really targets the biceps.
- Hammer Curls: 3 sets of 12-15 reps. Rest 60 seconds. These work the brachialis and brachioradialis, adding thickness to your arms.
Remember, the quality of your reps matters more than just going through the motions. Focus on the mind-muscle connection and feel the target muscles working. This approach is key for long-term muscle growth.
This workout is designed to give your back and biceps a significant stimulus. Don't be afraid to push yourself, but always prioritize good form to avoid injuries. You've got this!
Day 5: Legs Hypertrophy
Alright, we're hitting the final leg day of the week, and this one is all about building that muscle size. Forget just moving weight; today is about feeling the burn and getting a good pump. We want to fatigue those muscles to really stimulate growth.
We'll start with some Goblet Squats. Really focus on keeping that weight close to your chest and try to get as deep as you comfortably can. Aim for 4 sets of 10-15 reps, resting about 60-90 seconds between sets.
Next up are Walking Lunges. These are great for hitting each leg individually. Do 3 sets of 12-15 reps for each leg, again with 60-90 seconds of rest. Make sure each step is controlled.
To really isolate the quads and hamstrings, we'll move on to some machine work. We've got Leg Extensions for 3 sets of 15-20 reps, followed by Seated Leg Curls for another 3 sets of 15-20 reps. Keep the rest periods short here, around 60 seconds.
Finally, we'll finish off with Standing Calf Raises. Calves can be stubborn, so we're going for higher reps here: 4 sets of 20-25 reps, with just 45 seconds of rest. The key to hypertrophy is consistent tension and volume, so don't skip these.
Remember, hitting your legs hard twice a week, with one day focused on strength and this day on hypertrophy, is a solid strategy for building impressive lower body development. It allows for adequate recovery while still providing enough stimulus for growth.
This approach ensures you're giving your legs the attention they need to grow. If you're looking for a way to track your progress and adjust your workouts, consider using a fitness app that can help tailor your training volume based on your performance.
Day 6: Active Recovery
Alright, so we've hit it hard for five days straight. Now it's time to give your body a break, but not a complete shutdown. Day 6 is all about active recovery. Think of it as helping your muscles heal and get ready for the next round, instead of just sitting on the couch.
The main goal here is to get blood flowing to your muscles without adding any extra stress. This helps clear out waste products that build up during intense workouts and can actually make you feel better, less stiff. It’s not about pushing yourself; it’s about gentle movement.
Here are a few things you can do:
- Light Cardio: A brisk walk for 20-30 minutes, a leisurely bike ride, or even some light swimming works great. Just keep the intensity low.
- Mobility Work: Spend some time with a foam roller, focusing on any areas that feel tight, like your hamstrings, hips, or upper back. Some gentle stretching or yoga poses can also be really beneficial.
- Hydration and Nutrition: Don't forget to drink plenty of water throughout the day. Your body is still repairing itself, so keep up with your protein intake too. Good nutrition is key even on rest days.
Remember, recovery isn't just about taking days off; it's an active process. What you do on your rest days can significantly impact your progress. Prioritizing sleep and light activity helps your muscles repair and rebuild, making you stronger for your next training session. It's a smart way to support your gains and prevent burnout.
This active recovery phase is absolutely crucial for long-term progress. You can find more tips on crafting your workout schedule to make sure you're balancing intensity with adequate rest.
Barbell Bench Press
The barbell bench press is a cornerstone exercise for building upper body muscle, especially for your chest, shoulders, and triceps. It's a compound movement, meaning it works multiple muscle groups at once, making it super efficient for strength gains. When done correctly, it's one of the best ways to build a strong chest.
Getting the most out of your bench press comes down to a few key points:
- Setup is Key: Lie on the bench with your feet flat on the floor, creating a stable base. Retract your shoulder blades, pulling them back and down, and maintain a slight arch in your lower back. This creates a solid platform.
- Grip Matters: Grip the barbell firmly, just outside shoulder-width. Your grip should feel secure and powerful.
- Controlled Descent: Lower the bar slowly and with control towards your mid-chest. Aim for a spot just below your nipples. Don't let the bar bounce off your chest.
- Explosive Push: Drive the bar back up powerfully, extending your arms. Focus on pushing your chest up towards the bar.
Here's a typical rep and set scheme you might see in a strength-focused workout:
| Exercise | Sets | Reps | Rest (seconds) |
|---|---|---|---|
| Barbell Bench Press | 4 | 5-8 | 90-120 |
Remember, form is more important than the weight on the bar. If you're new to the bench press, start with lighter weights to master the movement. You can find more details on proper bench press technique to help you get started.
Focusing on progressive overload, whether that's adding a little more weight, doing an extra rep, or shortening rest times, is how you'll keep getting stronger over time. Don't just stick to the same routine week after week without trying to improve.
Barbell Back Squat
The barbell back squat is a cornerstone exercise for building lower body strength and overall muscle mass. It's a compound movement, meaning it works multiple muscle groups at once, including your quads, glutes, hamstrings, and even your core for stability. Getting the form right is absolutely key to getting the benefits and avoiding injury.
When you're setting up for a back squat, stand with your feet about shoulder-width apart, or slightly wider if that feels more comfortable. Your toes can point slightly outward. The barbell should rest on your upper back, across your traps, not directly on your neck. Keep your chest up and your core tight throughout the entire movement. Imagine you're sitting back into a chair.
Here’s a quick breakdown of the movement:
- Descent: Initiate the movement by pushing your hips back and bending your knees simultaneously. Lower yourself down in a controlled manner, keeping your back straight and your knees tracking in line with your toes. Aim to get your thighs at least parallel to the floor.
- Pause (Optional): Some people like to pause briefly at the bottom to ensure a full range of motion and eliminate any momentum.
- Ascent: Drive through your heels and mid-foot to stand back up, extending your hips and knees. Keep your core braced.
It's really important to start with a weight you can manage with good form. If you're new to squats, consider using lighter weights or even just the barbell to practice the movement. You can find some great tips on how to perform back squats correctly to help you get started. Don't be afraid to ask a trainer for a spot or form check.
The goal is to build strength and muscle over time. Rushing the process or using too much weight with bad form will only set you back. Focus on progressive overload – gradually increasing the weight, reps, or sets as you get stronger.
This exercise is fantastic for building a strong foundation, and it's a great way to improve your athletic performance and everyday functional strength. Just remember to prioritize form over weight every single time.
Romanian Deadlifts
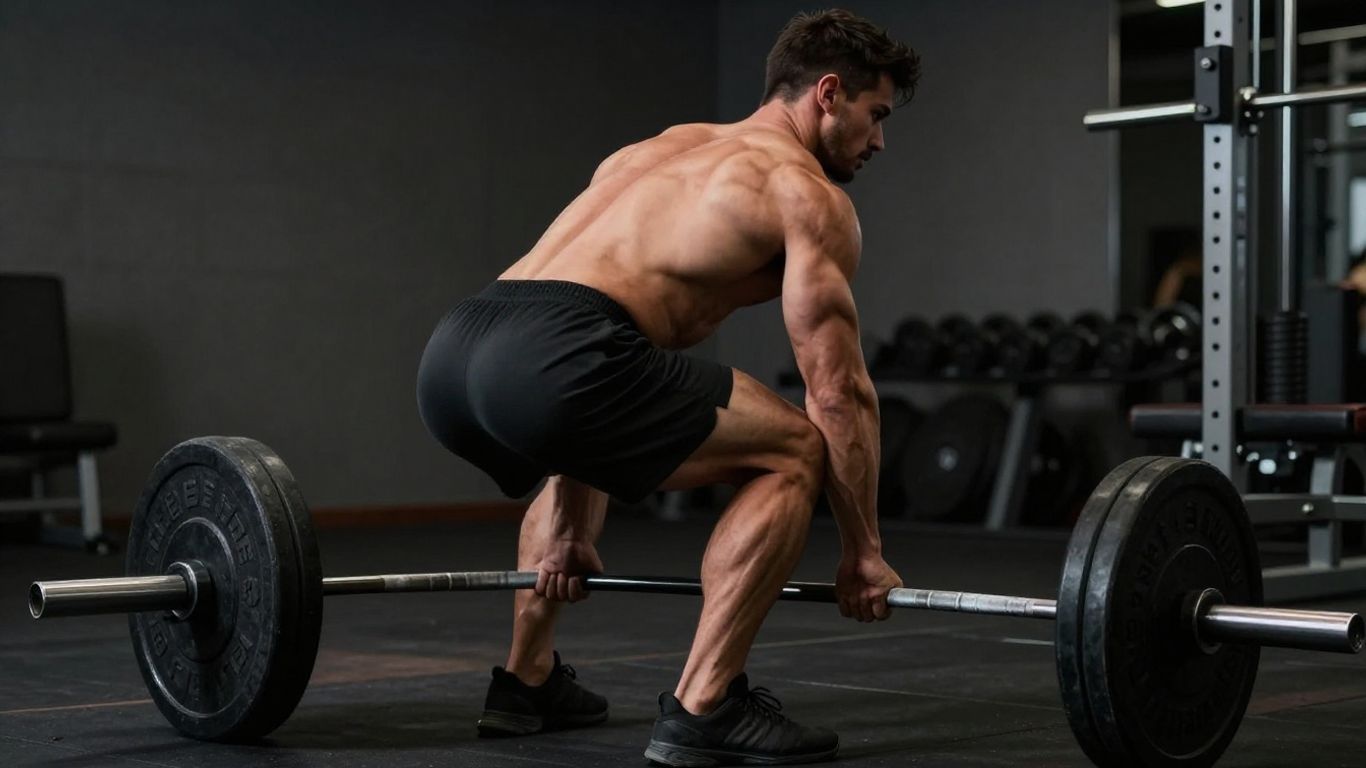
Romanian Deadlifts, or RDLs, are a fantastic exercise for hitting your hamstrings and glutes hard. They're a bit different from a conventional deadlift because you're focusing more on the stretch and contraction of the posterior chain rather than lifting the weight off the floor with maximum force. This movement is all about controlling the eccentric (lowering) phase and feeling that deep stretch in your hamstrings.
When you do RDLs, think of it as a hip hinge. You're pushing your hips straight back, keeping a slight bend in your knees, and lowering the weight down your shins. Your back should stay straight the entire time – no rounding allowed! You'll feel a good stretch in your hamstrings when you reach the bottom, then you'll drive your hips forward to return to the starting position.
Here's a breakdown of how to perform them:
- Starting Position: Stand with your feet hip-width apart, holding a barbell or dumbbells in front of your thighs. Your knees should have a slight bend, and your back should be straight.
- The Hinge: Keeping your back flat and your core engaged, push your hips backward as if you're trying to touch a wall behind you with your glutes. Lower the weight down along your shins, maintaining that slight knee bend.
- The Stretch: Continue lowering the weight until you feel a strong stretch in your hamstrings. This is usually around mid-shin level, but it depends on your flexibility. Don't force it past your comfortable range of motion.
- The Return: Drive your hips forward, squeezing your glutes to return to the upright starting position. Keep the weight close to your body throughout the movement.
| Exercise | Sets | Reps | Rest (seconds) |
|---|---|---|---|
| Romanian Deadlifts (RDLs) | 3 | 8-10 | 90 |
Remember, the goal here isn't to lift as much weight as possible. It's about controlled movement and feeling the stretch in your hamstrings. Focus on proper form to get the most out of this exercise and avoid injury. If you're unsure about your technique, checking out a guide on how to perform deadlifts can be really helpful.
Incline Dumbbell Press
This exercise is a real gem for targeting the upper portion of your chest, giving it that full, rounded look. When you're doing the incline dumbbell press, you're essentially hitting your pectoralis major at a different angle than a flat bench press, which is great for overall chest development.
Focus on controlling the weight throughout the entire movement, especially on the way down. Don't just let gravity do the work. A slow, three-second descent, for example, really makes those muscle fibers work harder and can lead to better growth.
Here's a quick breakdown of how to do it right:
- Set an adjustable bench to an incline, usually between 30 and 45 degrees. Too steep, and you'll put too much stress on your shoulders.
- Grab a dumbbell in each hand. Lie back on the bench, feet planted firmly on the floor. Hold the dumbbells at chest level, palms facing each other or slightly turned inward.
- Press the dumbbells straight up, bringing them together slightly at the top, but don't let them clang. Then, slowly lower them back down to the starting position, feeling a good stretch in your chest.
Remember, the goal here is muscle growth, so aim for a rep range that challenges you. If you're doing 8-12 reps, the last couple of reps should feel tough but doable with good form. Don't sacrifice form just to lift heavier.
This movement is typically done for 3-4 sets, with reps ranging from 8 to 12. Rest periods are usually around 60 to 90 seconds between sets to allow for adequate recovery without letting your heart rate drop too much.
Weighted Pull-Ups
Weighted pull-ups are a fantastic way to really push your back and bicep development to the next level. If you've been doing regular pull-ups for a while and they're starting to feel a bit too easy, adding weight is the next logical step. It's all about making the exercise harder over time, which is how muscles grow.
This exercise is a powerhouse for building upper body strength and size. When you add weight, you're forcing your muscles to work against a greater resistance, which signals them to adapt and get stronger. It's a direct way to increase the challenge and see results.
Here's a breakdown of how to approach weighted pull-ups:
- Start with a manageable weight: Don't go crazy on your first try. Use a weight belt or a dumbbell between your feet that allows you to complete at least 5-6 good reps. The goal is quality over quantity.
- Focus on form: Just like regular pull-ups, keep your chest up, pull yourself towards the bar, and control the descent. Avoid kipping or using momentum to swing yourself up.
- Progression is key: Once you can comfortably hit your target rep range (say, 8-10 reps) with a certain weight, it's time to add a little more. This is how you keep making progress and avoid hitting a plateau.
Here’s a sample rep and set scheme you can work with:
| Exercise | Sets | Reps | Rest (seconds) |
|---|---|---|---|
| Weighted Pull-Ups | 4 | 6-10 | 90 |
Remember, consistency is super important. If you're looking for more guidance on how to structure your workouts, checking out resources on proper pull-up form can be really helpful. It's not just about adding weight; it's about doing it right to get the most out of every rep.
Goblet Squats
The Goblet Squat is a fantastic exercise, especially if you're just getting into squats or want to focus on your lower body without the complexity of a barbell. You hold a single dumbbell or kettlebell right at your chest, like you're holding a fancy goblet. This position naturally helps you keep your chest up and your back straight, which is super important for good form.
This exercise is great for building quad and glute strength while also improving your posture.
Here's a quick rundown on how to do it:
- Stand with your feet about shoulder-width apart, maybe a little wider if that feels more comfortable. Point your toes out slightly.
- Hold a dumbbell or kettlebell vertically against your chest with both hands. Keep your elbows tucked in.
- Take a deep breath, brace your core, and push your hips back as if you're going to sit in a chair. Lower yourself down.
- Try to get your thighs at least parallel to the floor. Make sure your knees track in line with your toes and don't collapse inward.
- Push through your heels to stand back up, squeezing your glutes at the top.
The key here is to control the movement. Don't just drop into the squat. Think about sitting back and down, keeping that weight close to your chest the whole time. It really helps you get a good stretch in your hips and works your quads hard.
Aim for about 4 sets of 10-15 reps. Rest for 60-90 seconds between sets. It's a solid movement for building that lower body foundation.
Seated Dumbbell Shoulder Press
This exercise is a go-to for building strong, well-rounded shoulders. It really targets the front and side parts of your deltoids, which give your shoulders that capped look. Plus, it’s a great way to work on shoulder strength without putting as much stress on your lower back compared to standing presses.
Focus on controlled movement and proper form to get the most out of this exercise.
Here’s a breakdown of how to do it right:
- Setup: Sit on a bench with back support. Hold a dumbbell in each hand at shoulder height, palms facing forward. Your feet should be flat on the floor.
- The Press: Press the dumbbells straight up overhead until your arms are almost fully extended. Keep a slight bend in your elbows at the top to avoid locking them out.
- The Lower: Slowly lower the dumbbells back down to the starting position with control. Don't let them just drop.
Sets and Reps:
| Workout Focus | Sets | Reps | Rest (seconds) |
|---|---|---|---|
| Upper Body Strength | 3 | 8-10 | 60-90 |
| Push Hypertrophy | 3 | 10-12 | 60-90 |
When you're pressing the weights up, think about pushing them away from you, not just straight up. This helps engage your shoulders more effectively and keeps the movement feeling natural. Control the descent just as much as the press itself; that’s where a lot of the muscle-building work happens.
Lat Pulldowns
Lat pulldowns are a fantastic exercise for building up your back muscles, especially the lats, which give you that V-taper look. They're a great alternative or supplement to pull-ups, especially if you're not quite strong enough for those yet. This movement really helps develop upper body pulling strength.
When you do lat pulldowns, think about driving your elbows down towards your hips. It's not just about pulling the bar to your chest; it's about engaging those back muscles to do the work. Keep your chest up and avoid leaning back too much, which can take the focus off your lats.
Here's a breakdown of how to perform them effectively:
- Grip: Use a wide overhand grip, slightly wider than shoulder-width. You can also experiment with different grips, like a neutral or underhand grip, to target the muscles slightly differently.
- Movement: Sit down, grab the bar, and pull it down towards your upper chest. Focus on squeezing your shoulder blades together at the bottom of the movement.
- Return: Slowly let the bar back up, controlling the weight throughout the entire range of motion. Don't let it just snap back up.
This exercise is super versatile and can be adjusted based on your goals. For strength, you might stick to lower reps with heavier weight, while for muscle growth, you'll want to increase the reps and focus on that mind-muscle connection. You can explore diverse lat pull-down exercises to target specific back muscles, build strength, and improve overall athletic performance [ae7e].
Remember, consistency is key. Even though this is a great exercise for building your back, it's just one piece of the puzzle. Make sure you're incorporating it into a well-rounded program that hits all your major muscle groups.
Dumbbell Skull Crushers
Dumbbell Skull Crushers are a great way to target your triceps, those often-forgotten muscles on the back of your upper arm. This exercise really isolates the triceps, helping them grow bigger and stronger. It's a bit of a tricky name, I know, but it just refers to how you lower the dumbbells towards your head.
When you do these, you're lying on a bench, holding dumbbells. You'll bend your elbows to lower the weights towards your forehead, then extend your arms back up. It's important to keep your upper arms pretty still throughout the movement. Think about moving just your forearms.
Here’s a quick rundown on how to do them right:
- Lie on a flat bench with a dumbbell in each hand. Hold them straight up over your chest, palms facing each other.
- Keeping your upper arms vertical and elbows tucked in, slowly bend your elbows to lower the dumbbells towards your head. Go as low as you comfortably can without pain.
- Pause for a second at the bottom, then extend your arms back to the starting position, squeezing your triceps at the top.
The key here is control. Don't let gravity do all the work. Focus on the muscle contraction and the stretch. If you feel any joint pain, especially in your elbows, ease up on the weight or adjust your form. It's better to do fewer reps with good form than to push through pain.
This exercise is usually done for hypertrophy, meaning muscle growth, so you'll want to aim for a rep range that challenges you. Something like 3 sets of 10-12 reps is a good starting point. Make sure you rest about 60 seconds between sets to let your muscles recover a bit before the next round.
T-Bar Row
The T-bar row is a fantastic exercise for building thickness in your upper back, hitting those rhomboids and traps hard. It's a great compound movement that also brings in your lats and biceps.
Focus on squeezing your shoulder blades together at the top of the movement. This isn't just about pulling the weight; it's about actively contracting the muscles in your back. Think about pulling your elbows towards the ceiling, not just lifting the bar.
Here’s how to get the most out of it:
- Grip: Use a neutral grip (palms facing each other) if using a V-bar attachment. If using a standard barbell with a landmine attachment, a shoulder-width grip is common.
- Stance: Stand with your feet about shoulder-width apart, knees slightly bent. Hinge at your hips, keeping your back straight and chest up. You want to be in a stable, athletic position.
- Movement: Pull the weight towards your sternum or lower chest, focusing on that powerful squeeze of your shoulder blades. Control the weight as you lower it back down, feeling a stretch in your upper back.
This exercise is usually done for 3 sets of 8-12 reps, with about 60-90 seconds of rest between sets. It fits perfectly into your Pull Hypertrophy day.
When performing T-bar rows, it's easy to let your lower back round if you go too heavy or don't maintain a strong core. Keep your back flat and your core braced throughout the entire set to protect yourself and get the best muscle activation.
Face Pulls
Face pulls are a fantastic exercise for targeting those often-neglected muscles in the upper back and rear shoulders. They're great for improving posture and shoulder health, which is something a lot of us could use. This movement helps counteract the forward-pulling nature of many daily activities and other gym exercises.
When you're doing face pulls, think about pulling the rope towards your face, aiming for your forehead or nose. As you pull, try to really squeeze your shoulder blades together. It's not just about moving the weight; it's about the mind-muscle connection.
Here's a breakdown of how to perform them:
- Set up the cable machine with a rope attachment at about chest height.
- Grab the rope with an overhand grip, palms facing down.
- Step back to create tension on the cable.
- Pull the rope towards your face, leading with your elbows and keeping them high.
- Focus on squeezing your rear deltoids and upper back muscles at the end of the movement.
- Slowly return to the starting position, controlling the weight.
This exercise is usually done for higher reps to really get a good pump and focus on muscle endurance. Aim for sets of 15-20 reps. It's a good idea to incorporate them into your pull hypertrophy day or even on active recovery days if you're feeling tight. You can find more details on proper form in our exercise library here.
Don't underestimate the power of these smaller muscles. Strengthening your upper back and rear delts can make a big difference in how you look and feel, preventing imbalances and improving your overall movement patterns.
Incline Dumbbell Curls
Alright, let's talk biceps. Incline Dumbbell Curls are a fantastic way to really stretch out your biceps at the bottom of the movement, which can be a game-changer for growth. You're basically setting yourself up for a deeper contraction.
Here's how to get the most out of them:
- Set up: Grab a pair of dumbbells and sit back on an incline bench, usually set around 45-60 degrees. Let the dumbbells hang straight down with your palms facing forward.
- The Curl: Keeping your upper arms still, curl the dumbbells up towards your shoulders. Focus on squeezing your biceps at the top.
- The Lower: Slowly lower the dumbbells back down, feeling that stretch in your biceps. Don't just let them drop; control the movement.
The key here is to really focus on that stretch and contraction, not just swinging the weight.
This exercise is great because it hits the long head of your bicep more directly than some other curls. It's a solid addition to your pull hypertrophy day, or really any day you're looking to give those arms some extra attention. Just remember to keep the ego in check and use a weight you can control for the full range of motion. Nobody grows from sloppy reps.
When you're doing incline curls, think about letting your arms hang fully at the bottom. That stretch is where a lot of the magic happens for muscle fibers. Don't cut that short just to get the weight up faster.
Hammer Curls
Hammer curls are a fantastic exercise for building up your biceps and forearms. They work the muscles in a slightly different way than standard curls, which can lead to more balanced arm development. This movement also helps improve your grip strength, which is useful for all sorts of other lifts.
When you do hammer curls, you hold dumbbells with your palms facing each other, like you're holding a hammer. Then, you curl the weights up towards your shoulders, keeping that neutral grip the whole time. It's a pretty straightforward motion, but don't let that fool you; it really hits the target muscles.
Here's a breakdown of how to perform them:
- Start by standing with a dumbbell in each hand, letting them hang at your sides. Your palms should be facing your body.
- Keeping your upper arms still, curl the weights up towards your shoulders. Focus on squeezing your biceps at the top of the movement.
- Slowly lower the dumbbells back to the starting position, controlling the weight throughout the entire range of motion.
This exercise is great because it's relatively easy on the elbows and wrists compared to some other bicep movements. It's a solid choice for adding to your pull hypertrophy day, aiming for about 3 sets of 12-15 reps. You can find more details on performing hammer curls correctly if you want to be sure you're getting the most out of it.
Don't underestimate the power of variation in your training. Adding hammer curls can help break through plateaus and ensure you're working your arms from multiple angles. It's a simple addition that can make a noticeable difference in your overall arm size and strength.
Leg Press
The leg press is a fantastic machine for hitting your quads, glutes, and hamstrings without the same kind of technical demand as squats. It lets you focus on pushing weight and getting a good burn, especially when you're aiming for muscle growth.
This exercise is great for building overall leg mass and can be a solid addition to your lower body routine.
Here's a typical setup:
- Sets: 3
- Reps: 10-12
- Rest: 60-90 seconds between sets
When you're on the machine, make sure your feet are placed comfortably on the platform, usually about shoulder-width apart. Don't let your knees cave inward as you push; keep them tracking over your toes. Also, avoid locking out your knees completely at the top of the movement to keep tension on the muscles. Lower the weight under control, feeling a stretch in your quads and glutes before pressing back up.
The leg press allows for a lot of variation in foot placement, which can target different parts of your leg muscles. Placing your feet higher on the platform tends to hit your glutes and hamstrings more, while a lower foot placement emphasizes the quads. Experiment to see what feels best for you and your goals.
It's a good idea to include this after your primary compound lifts like squats or deadlifts, as it allows you to push those leg muscles to fatigue effectively.
Lying Leg Curls
Lying leg curls are a fantastic way to really isolate and build up those hamstrings. They're a key player in developing balanced leg strength, especially when you're looking to create a good ratio between your quads and hamstrings. This exercise is all about that hamstring contraction, giving them a solid stimulus for growth.
Focus on controlling the movement, especially on the way down. Don't just let the weight snap back. You want to feel the stretch in your hamstrings at the bottom and then squeeze them to bring the weight up.
Here's a typical setup for this exercise:
- Sets: 3
- Reps: 12-15
- Rest: 60 seconds between sets
When you're doing lying leg curls, make sure the pad is positioned correctly on your lower calf, just above the ankle. You want to keep your hips pressed into the bench throughout the entire movement. This stops you from using momentum and keeps the work right where it belongs – in your hamstrings. It's a great addition to your lower body strength routine.
It's easy to get caught up in just lifting heavy, but for exercises like leg curls, the mind-muscle connection is super important. Really think about squeezing your hamstrings with each rep. This helps make sure you're actually building the muscle you're targeting, rather than just going through the motions.
Standing Calf Raises
Don't forget about your calves! They're often overlooked, but strong calves can really help with your overall leg development and even improve your jumping ability. Standing calf raises are a straightforward way to target these muscles.
Focus on a full range of motion, pushing up onto your toes and then letting your heels drop as low as comfortable to get a good stretch.
Here's how to do them:
- Stand with the balls of your feet on an elevated surface, like a weight plate or the edge of a step. Your heels should be hanging off.
- Hold dumbbells or a barbell for added resistance, or use a calf raise machine if available.
- Push up through the balls of your feet, lifting your heels as high as possible. Squeeze your calves at the top.
- Slowly lower your heels back down, feeling a stretch in your calf muscles.
Aim for 4 sets of 15-20 reps. Remember, controlled movements are key here, not just bouncing up and down. Getting your lower-body strength right involves hitting all the muscles, and calves are part of that equation.
Proper form is super important for calf raises. Make sure you're not using momentum to swing yourself up. Control the movement both on the way up and on the way down to really feel the burn in your calves.
Seated Arnold Press
The Seated Arnold Press is a fantastic exercise for hitting your shoulders from multiple angles. It's a bit different from a standard overhead press because it involves a rotational movement, which really targets the front and side deltoids.
This movement is great for building overall shoulder mass and definition. It's usually done on a hypertrophy day, meaning we're aiming for more reps and a good muscle pump rather than just lifting super heavy.
Here's how to do it right:
- Sit on a bench with back support. Hold a dumbbell in each hand at shoulder height, palms facing your body.
- As you press the dumbbells upward, rotate your palms so they face forward by the time your arms are fully extended overhead.
- Slowly reverse the motion on the way down, rotating your palms back to face your body as the dumbbells return to the starting position.
Try to keep the movement smooth and controlled. Don't let the dumbbells just drop; guide them down.
The key here is the controlled rotation. It's not just about pushing the weight up; it's about the path the dumbbells take and how that engages your shoulder muscles throughout the entire range of motion. Focus on feeling the squeeze in your shoulders at the top.
Sets and Reps: Aim for 3 sets of 10-12 repetitions. Rest for about 60-90 seconds between sets. This rep range is generally good for muscle growth (hypertrophy).
Cable Crossovers
Cable crossovers are a fantastic way to finish off your chest day, especially on a hypertrophy-focused push day. They really let you focus on squeezing those pectoral muscles and getting a good pump without putting too much stress on your shoulders or elbows.
This exercise is all about isolating the chest, particularly the inner and lower portions, by bringing your arms together in front of your body. It’s a great movement for adding that finishing touch after your heavier compound lifts like the bench press.
Here’s how to get the most out of them:
- Setup: Stand in the middle of a cable station with a pulley set at chest height. Grab a handle in each hand. Take a small step forward to create tension in the cables.
- Execution: With a slight bend in your elbows, bring your hands together in front of your torso in a wide, sweeping motion. Focus on contracting your chest muscles at the peak of the movement. Slowly return to the starting position, controlling the weight.
- Focus: Think about squeezing your pecs together, almost like you're trying to clap your hands together in front of you, but with the cables providing the resistance.
Cable crossovers are typically done for higher repetitions to really burn out the muscle. Aim for sets of 12-15 reps, and don't be afraid to really feel that stretch and contraction.
When you're doing cable crossovers, it's easy to let your shoulders or arms do most of the work. Try to keep your upper arms relatively stable and let your chest muscles do the pulling. Imagine you're hugging a tree, but in a controlled, squeezing motion. This helps keep the focus right where you want it – on your pecs.
Dumbbell Lateral Raises
Dumbbell lateral raises are a great way to target the side part of your shoulders, also known as the medial deltoids. Getting these muscles to grow can really help give your shoulders that rounded, strong look. It's all about isolating that side delt for maximum width.
When you do these, think about lifting the weight out to the sides, not just up. Imagine you're pouring a pitcher of water with the dumbbells as you reach the top. Keep a slight bend in your elbows throughout the movement; don't let them lock out.
Here’s a simple breakdown:
- Start standing with a dumbbell in each hand, arms hanging at your sides. Keep a slight bend in your elbows.
- Lift the dumbbells out to your sides, keeping that slight bend, until your arms are roughly parallel to the floor. Focus on leading with your elbows.
- Slowly lower the dumbbells back to the starting position with control.
| Exercise | Sets | Reps | Rest (seconds) |
|---|---|---|---|
| Dumbbell Lateral Raises | 3 | 15-20 | 45-60 |
Don't go too heavy on these. It's way more important to feel the burn in your side delts than to just move the weight. If your form breaks down or you start swinging the weights, you're probably using too much weight.
Keep Pushing Forward
So, you've got the plan. Six days a week might sound like a lot, but remember, this is about building yourself up. Stick with it, focus on your form, and don't forget to eat well and get enough sleep. Progress isn't always a straight line, and that's okay. Some days will feel tougher than others, but that's part of the process. Keep showing up, keep putting in the work, and you'll start seeing the changes you're aiming for. You've got this.
Frequently Asked Questions
What is a 6-day gym workout schedule?
A 6-day gym workout schedule is a fitness plan where you train for six days a week, with one day for rest. It usually involves splitting your workouts to focus on different muscle groups or types of training each day, like strength, muscle growth (hypertrophy), and active recovery.
Is this 6-day workout schedule good for beginners?
This schedule is designed to be challenging and effective for building muscle and strength. While beginners can adapt it by using lighter weights and focusing on proper form, it's a more intense program. Starting with a 3 or 4-day plan might be better for absolute beginners to build a foundation.
How does this schedule help build muscle?
This plan uses a mix of strength training and hypertrophy days. Strength days focus on lifting heavy weights for fewer reps to build raw power. Hypertrophy days use moderate weights for more reps to create tiny tears in your muscles, which then repair and grow bigger and stronger.
What is 'Active Recovery' on Day 6?
Active recovery means doing light physical activity that helps your body recover without adding stress. This could be walking, light cycling, stretching, or foam rolling. It helps improve blood flow and reduce muscle soreness, getting you ready for the next week of training.
How important is nutrition and rest with this schedule?
Nutrition and rest are super important! To build muscle, you need to eat enough protein and calories, especially after workouts. Getting enough sleep is also key because that's when your muscles actually repair and grow. Without good food and sleep, your workouts won't give you the best results.
What if I miss a workout day?
Don't worry if you miss a day! Life happens. The best thing to do is just pick up where you left off or adjust the schedule slightly. It's more important to be consistent over the long term than to be perfect every single week. Just try to get back on track as soon as you can.


0 comments